These instructions may vary depending on the specific version and plan of Xero you have — menu names, screens, and import limits change between plans and over time. If a step doesn't match what you see, check Xero's specific help documentation for your edition.
How this works
General accounting systems don't understand cumulative pay applications — but every pay application boils down to one incremental amount: the current payment due. The generator's Export button (in the toolbar above the form) turns the application you're working on into a CSV invoice for exactly that amount: a line per schedule-of-values item billed this period, plus one retainage-and-stored-materials adjustment row that makes the invoice tie to the application's bottom line. Import each application as its own invoice as you bill it.
Export to Xero, step by step
- 1Download the CSV from your pay applicationOpen your pay application in the generator and click Export in the toolbar above the form. In the dialog, choose Xero as the CSV format, then Download CSV (or Copy CSV to paste it into a spreadsheet). The file is an invoice for exactly that application's current payment due.
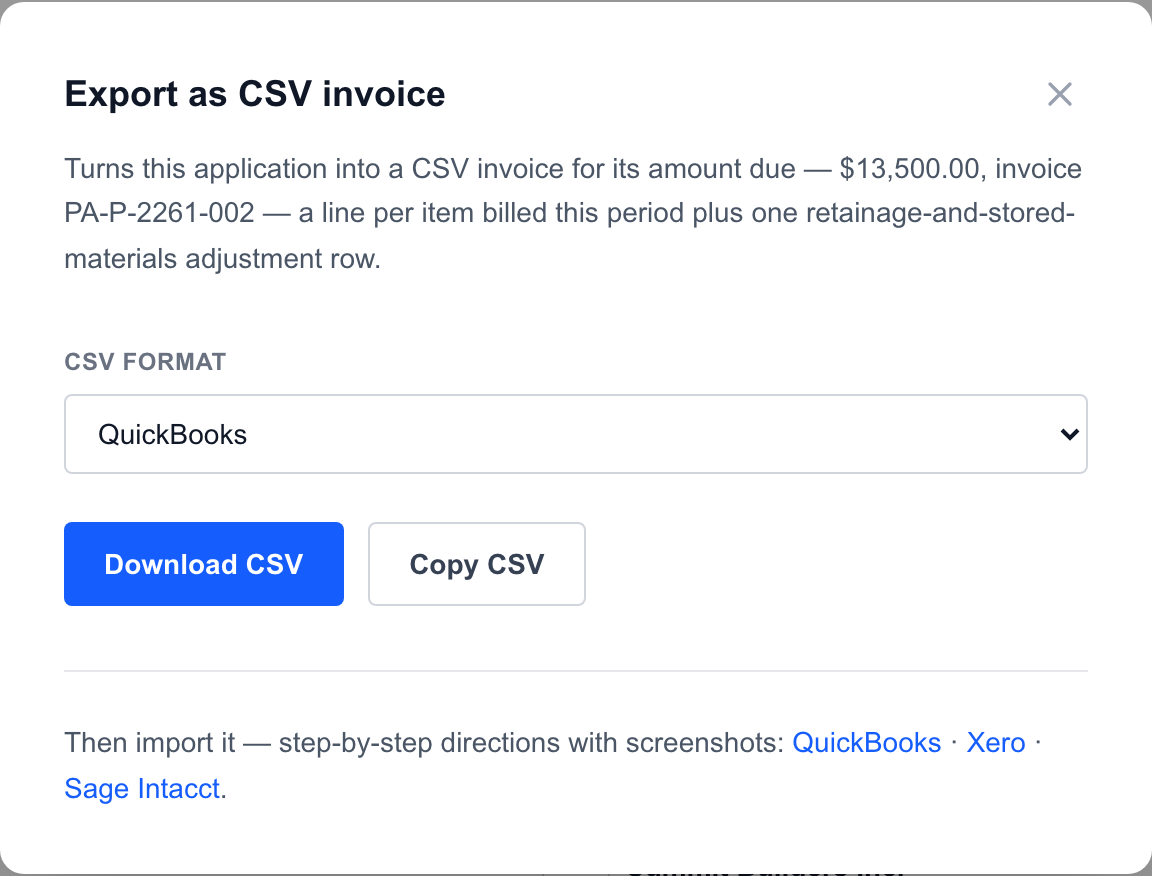
The Export button opens this dialog; pick your system's format there. - 2Open the import screenIn Xero, open the Business menu (called Sales in some organisations) → Invoices, and click Import.
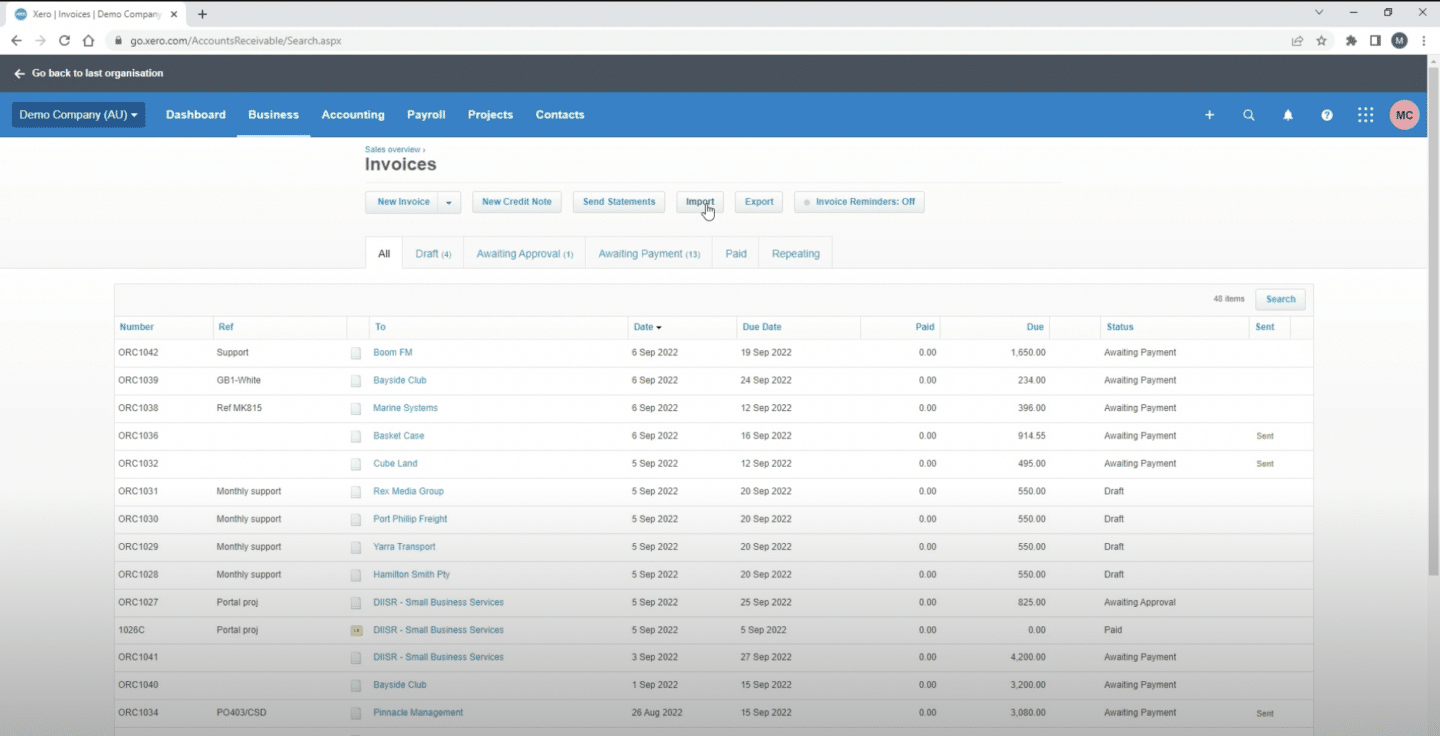
Xero's Invoices screen — the Import button sits beside New Invoice. © Xero Limited; product screenshot shown for instructional purposes. - 3Upload the CSVUpload the downloaded file on the import screen. Xero matches the contact by name and creates a new contact if none matches; when asked, leave address updates off and keep amounts Tax Exclusive.
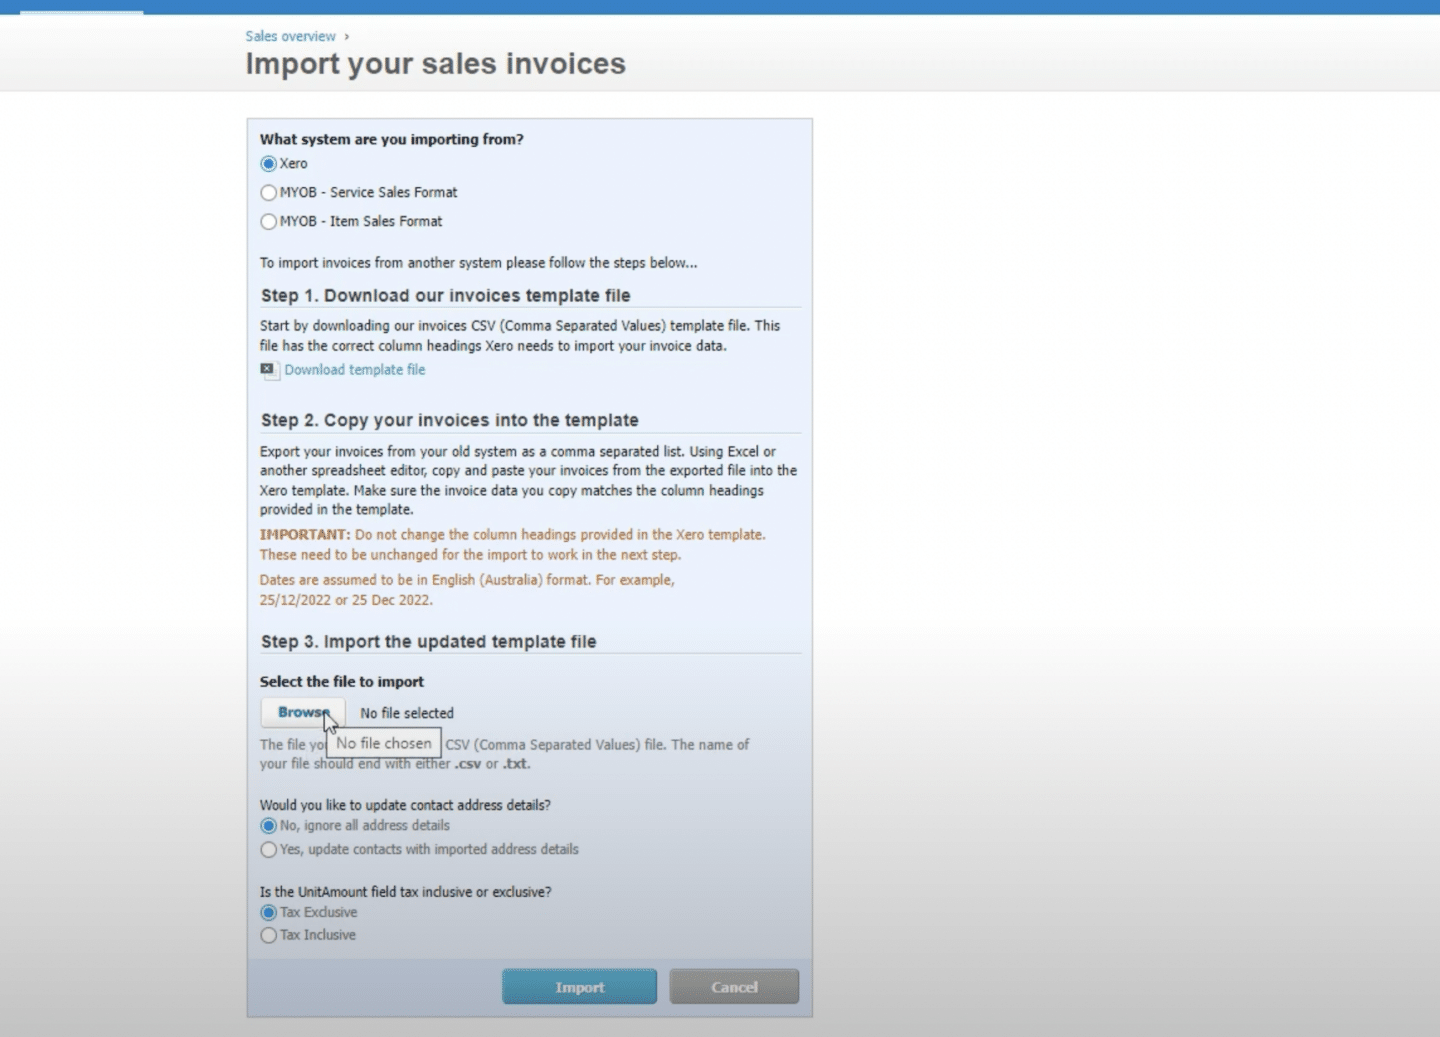
Xero's import screen: template download, file upload, and the tax-exclusive choice. © Xero Limited; product screenshot shown for instructional purposes. - 4Finish the draftImported invoices arrive as DRAFTS. Open the draft, set the account on each line (your construction income account; the adjustment line can go to a retainage receivable account instead — see the mapping notes), and confirm the tax treatment.
- 5ApproveApprove the draft. The invoice total should equal this application's current payment due.
Good to know
- •CSV invoice import is available on Xero's business plans; entry-level plans cap how many invoices you can send per month — the import still works within that quota. Confirm on your plan.
- •Xero's own template requires only ContactName and InvoiceNumber — this file fills the full set anyway, and caps well under Xero's 500-rows-per-import limit.
- •The AccountCode column is left blank on purpose: fill it with your sales account code before importing, or set the account on the draft afterwards.
- •TaxType is exported as "Tax Exempt" — change it in the file or on the draft if you charge tax on progress billings.
- •Dates use the US M/D/YYYY format.
How pay applications become invoices
A pay application is cumulative; accounting systems bill period by period. Each export is one invoice for the application's current payment due, and the retainage adjustment row can be booked against income (simple) or a retainage-receivable account (accrual-proper). The full methodology — both retainage methods with worked examples, the accounts to set up, and the monthly tie-out that keeps your ledger matching your certified billing — is covered in the accounting guide.
Build the pay application first — the export button sits right next to the download.
Create a pay applicationUsing a different system? QuickBooks · Sage Intacct · or the system-agnostic accounting guide.
Not affiliated with or endorsed by Intuit, Xero, or Sage. QuickBooks, Xero, and Sage Intacct are trademarks of their respective owners. Import features vary by plan and configuration — verify in your own account.