These instructions may vary depending on the specific version and plan of QuickBooks you have — menu names, screens, and import limits change between plans and over time. If a step doesn't match what you see, check QuickBooks's specific help documentation for your edition.
How this works
General accounting systems don't understand cumulative pay applications — but every pay application boils down to one incremental amount: the current payment due. The generator's Export button (in the toolbar above the form) turns the application you're working on into a CSV invoice for exactly that amount: a line per schedule-of-values item billed this period, plus one retainage-and-stored-materials adjustment row that makes the invoice tie to the application's bottom line. Import each application as its own invoice as you bill it.
Export to QuickBooks®, step by step
- 1Download the CSV from your pay applicationOpen your pay application in the generator and click Export in the toolbar above the form. In the dialog, choose QuickBooks as the CSV format, then Download CSV (or Copy CSV to paste it into a spreadsheet). The file is an invoice for exactly that application's current payment due.
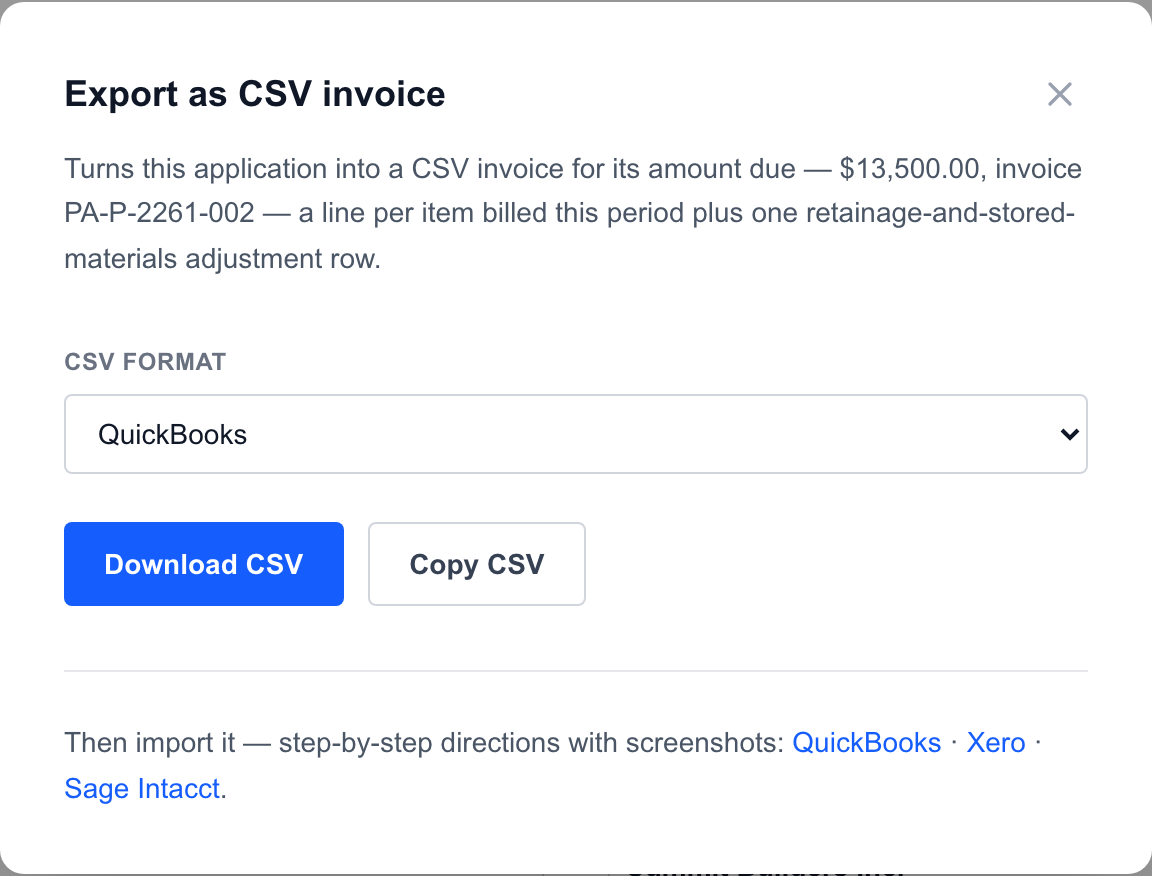
The Export button opens this dialog; pick your system's format there. - 2Open the import screenIn QuickBooks Online, open Settings (the gear icon, top right) and choose Import data under Tools.
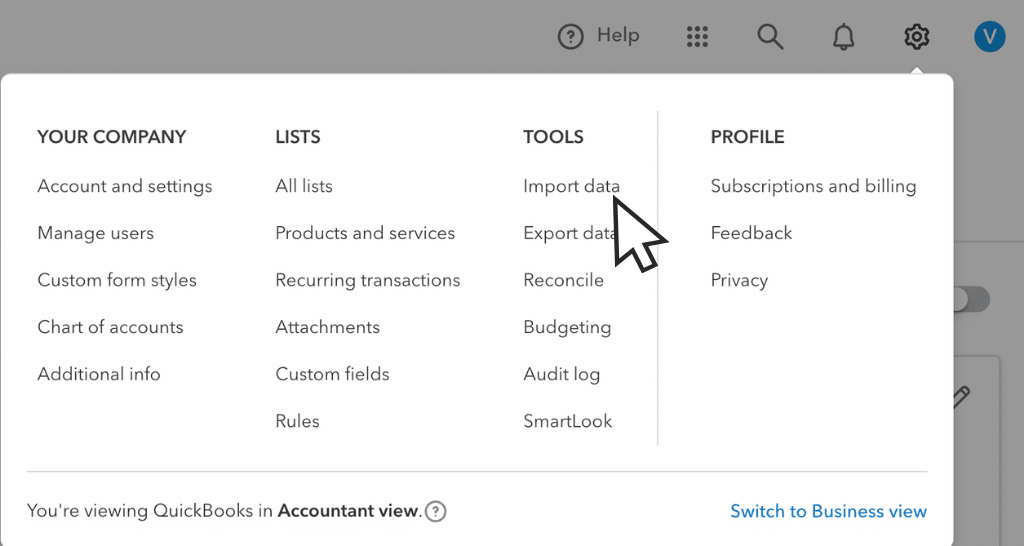
QuickBooks® Settings menu — Import data under Tools. Reprinted with permission © Intuit Inc. All rights reserved. - 3Choose InvoicesOn the Import Data screen, pick the Invoices tile.
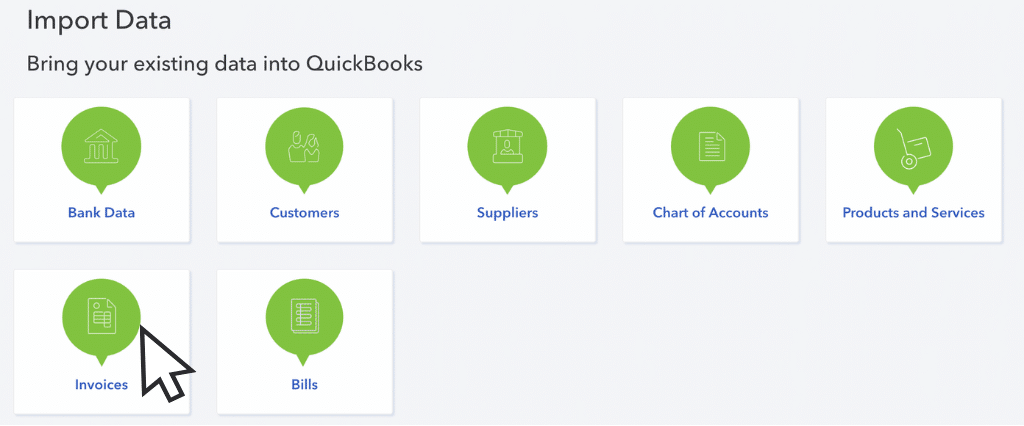
The Import Data screen — choose Invoices. Reprinted with permission © Intuit Inc. All rights reserved. - 4Upload the CSV and map the columnsUpload the downloaded file and map InvoiceNo, Customer, InvoiceDate, DueDate, ItemDescription, ItemQuantity, ItemRate, and ItemAmount. Rows sharing one InvoiceNo import as one multi-line invoice.
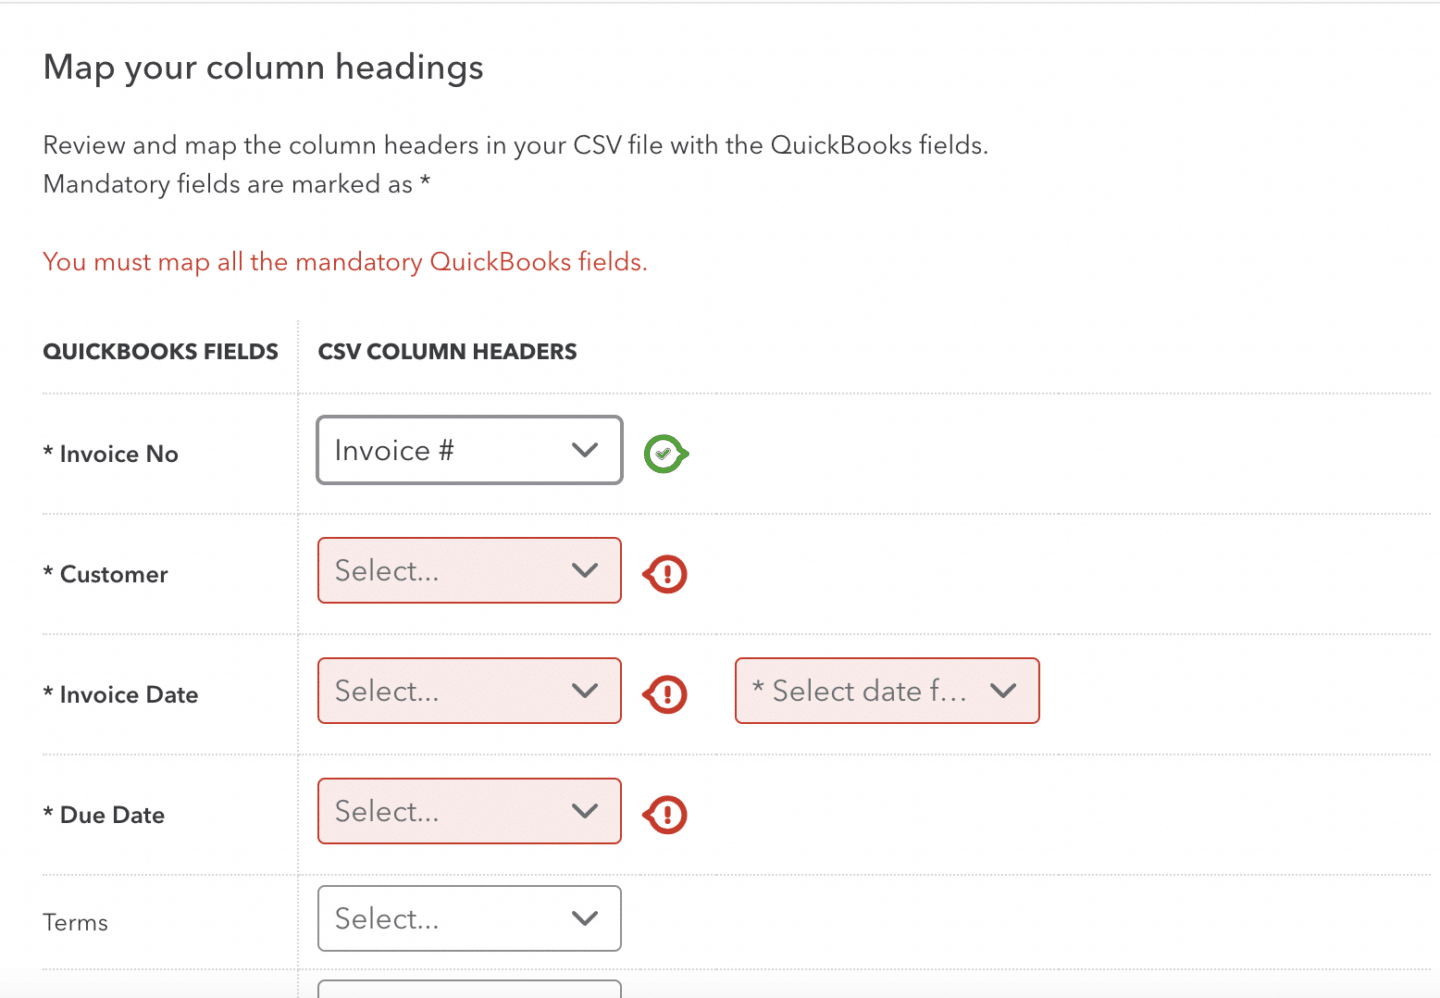
Map your CSV columns to QuickBooks fields. Reprinted with permission © Intuit Inc. All rights reserved. - 5Match the customerIf the customer name doesn't match an existing QuickBooks customer, QuickBooks offers to create it during import.
- 6Review and finishReview the preview and finish the import, then open the invoice to confirm the total matches this application's payment due.
Good to know
- •Invoice import via CSV is part of QuickBooks Online (Simple Start through Advanced) — confirm on your plan in Settings → Import data, as Intuit adjusts features between plans over time.
- •QuickBooks caps imports at 100 invoices and 1,000 rows per file — a single application is one invoice, far below the cap.
- •Dates in the file use the US M/D/YYYY format. If your company file uses another format, adjust in the import mapping step.
- •QuickBooks Desktop does not import CSV invoices natively — this export targets QuickBooks Online.
How pay applications become invoices
A pay application is cumulative; accounting systems bill period by period. Each export is one invoice for the application's current payment due, and the retainage adjustment row can be booked against income (simple) or a retainage-receivable account (accrual-proper). The full methodology — both retainage methods with worked examples, the accounts to set up, and the monthly tie-out that keeps your ledger matching your certified billing — is covered in the accounting guide.
Build the pay application first — the export button sits right next to the download.
Create a pay applicationUsing a different system? Xero · Sage Intacct · or the system-agnostic accounting guide.
Not affiliated with or endorsed by Intuit, Xero, or Sage. QuickBooks, Xero, and Sage Intacct are trademarks of their respective owners. Import features vary by plan and configuration — verify in your own account.